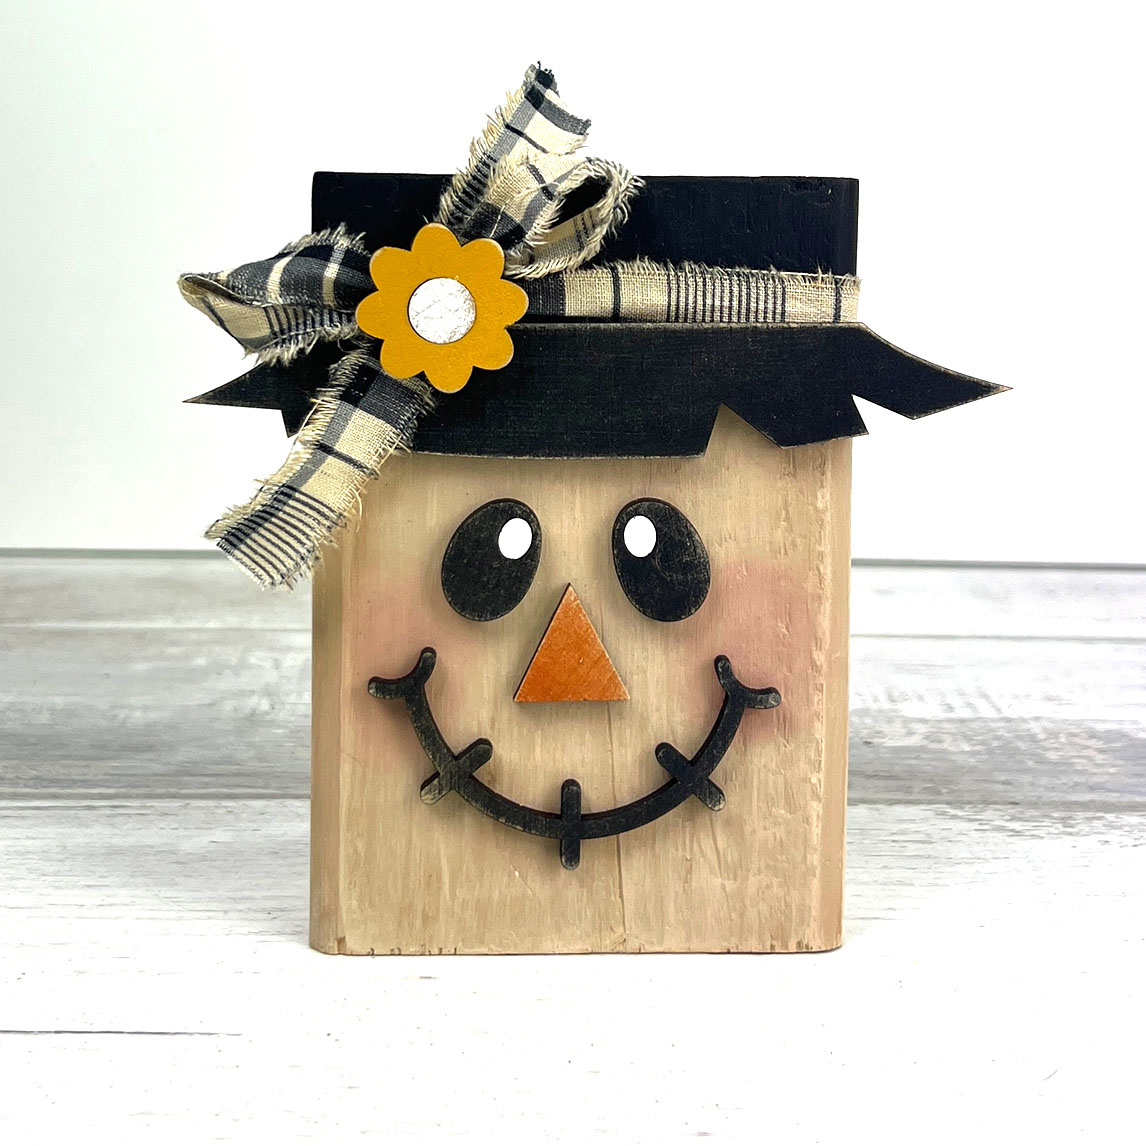
Some projects are complicated. This is not one of them—and that is part of what makes this little scarecrow so much fun.
Our wood block scarecrow is an easy fall craft that you can complete in an afternoon. It is perfect for decorating a shelf, desk, mantel, fall centerpiece, or anywhere that could use a little seasonal personality. It would also make a fun project for a craft night, paint party, classroom, or handmade market display.
The scarecrow’s face is created with layered laser-cut pieces attached to a simple wood block. We offer the design in two ways:
- Have a laser cutter? Purchase the Scarecrow Face SVG Bundle, which includes SVG, EPS, and DXF files.
- Prefer to start crafting right away? Our Scarecrow Face Blank Set includes five unfinished laser-cut tempered hardboard face sets, ready to paint and decorate...shipped to you.
The wood block, paint, fabric, glue, and other decorative supplies are not included with the blank set. That gives you the freedom to use the colors and materials you already have—or to give every scarecrow a completely different personality.
.jpg)
.jpg)
What We Used
For the scarecrow shown in our photos, we used:
- One 4.5-inch-long piece of 2x4 lumber (local lumber supplier is cheapest)
- One complete ShapeHouse Studio scarecrow face set
- FolkArt Home Decor Chalk Paint - Whispering Wheat for the face
- FolkArt Matte - Yellow Ochre, FolkArt Matte - Wicker White, FolkArt Matte - Black, and DecoArt Americana - Spiced Pumpkin for the layered face features and hat pieces
- Makeup sponges
- 220-Grit Sanding Blocks
- Gorilla Dries Clear Wood Glue
- A one-inch-wide strip of fabric ripped from a fat quarter
We will link the supplies we used throughout the post to make them easy to find. Some of those links are affiliate links, which means we may receive a small commission from qualifying purchases at no additional cost to you.
Our unfinished blanks are made from tempered hardboard. It is sturdy, cuts cleanly, and provides a smooth surface for painting. Because the pieces are laser cut, the edges may be honey brown or dark brown, and you may notice light scorch marks or flashback on the backs. Those are normal results of the laser-cutting process and are easily covered with paint or hidden once the project is assembled.
A Quick Note About the Hat
The scarecrow does not need a separate piece for the tall portion of the hat.
The painted wood block becomes the top of the hat. The laser-cut hat brim is glued across the front of the block near the top. Once the fabric and flower are added, the separate pieces come together to create the finished hat.
Simple, right?
Step 1: Prepare and Paint the Wood Block
Cut a standard 2x4 to approximately 4.5 inches long. Remember that a standard finished 2x4 measures about 1.5 inches deep and 3.5 inches wide.
Lightly sand the block, especially around the cut edges, and remove any dust.
For a more polished, professional-looking project, paint all sides of the block, including the front, back, sides, top, and bottom. We used FolkArt chalk paint for the scarecrow’s face because it provides excellent coverage and creates a soft, matte finish.
To create the hat, measure 1 inch down from the top of the block and mark a light guideline. Paint the entire section above that line black. The black-painted area becomes the crown of the scarecrow’s hat once the laser-cut brim is attached.
For an especially clean, straight edge between the face and hat colors, place painter’s tape along the 1-inch guideline before painting the black section. Remove the tape while the paint is still slightly damp to help prevent the edge from peeling.
Once the face paint is completely dry, lightly sand it with 220-grit sandpaper. This smooths the painted surface and gives the face a soft, slightly worn finish. Sand gently so you do not remove more paint than intended, then wipe away any sanding dust before moving on to assembly.
You could also:
- Stain the face instead of painting it
- Distress the edges more heavily
- Add rosy cheeks
- Dry-brush another color over the surface
- Use completely unexpected colors
Step 2: Paint the Scarecrow Pieces
Paint each laser-cut piece before assembling the face.
For our sample, we used:
- Black for the eyes, smile, and hat brim
- Orange for the nose
- Golden yellow for the flower
- White for the eye highlights and flower center
Helpful Painting Hint
We paint nearly all of our projects with inexpensive makeup sponges. They work wonderfully with craft paint, provide smooth and even coverage, and make it easy to apply light coats without leaving brush marks.
They are also inexpensive enough to keep plenty on hand for different paint colors.
Dab the paint onto the pieces rather than dragging the sponge across narrow or delicate sections. This helps prevent paint from building up along the edges.
Do not worry if the first coat does not cover the material completely. Two light coats generally create a smoother finish than one heavy coat. Allow the pieces to dry between coats.
Handle the smaller and narrower pieces carefully while painting and assembling them.
Step 3: Arrange and Glue the Face
Before reaching for the glue, place all of the painted pieces on the front of the block.
Position the eyes, nose, and smile until the expression looks right to you. Moving a piece even slightly can change the scarecrow’s entire personality, so this is a good time to experiment.
Once you are happy with the arrangement, glue each piece in place.
Use only a small amount of adhesive. Too much glue may squeeze out around the edges. If your glue needs additional drying time, place the block flat while the face pieces set.
Step 4: Finish the Hat
Glue the included hat brim across the front of the block near the top edge. The painted portion of the block above the brim becomes the top of the hat.
For the fabric accent, we ripped a strip approximately 1 inch wide from a fat quarter. Ripping the fabric instead of cutting it creates a soft, frayed edge that works especially well for a rustic fall project.
Wrap, tie, or tuck the fabric around the hat area. Glue it in place as needed, then attach the flower.
That is it—your scarecrow is ready for fall.
Add a Pair of Glasses
One of our favorite ways to give the scarecrow even more personality is with a pair of laser-cut glasses.
.jpg)
A different frame can completely change the finished look—from sweet and playful to delightfully quirky. Paint the glasses to coordinate with the hat and flower, use a contrasting color so they stand out, or create several pairs for different scarecrow styles.
We offer the glasses in two formats:
- Cut them yourself: Our Glasses SVG Bundle includes digital files for laser-cutter owners.
- Ready to paint: Our Unfinished Glasses Blank Set lets you skip the cutting and move right to decorating. We ship them to you.
The glasses are completely optional, but they are a simple and fun way to make each scarecrow feel like a character of its own.
Make It Your Own
Our finished projects, photographs, and videos are meant to provide inspiration—not a set of rules.
Change the colors. Move the eyes. Use burlap instead of fabric. Add raffia, buttons, patches, greenery, ribbon, glasses, or a tiny sign. Create a whole scarecrow family with different expressions and accessories.
The scarecrow faces work beautifully with 2x4 wood blocks, but the blocks are only one possibility. You could also use the faces on:
- Fall signs
- Door hangers
- A burlap sack to create a dimensional scarecrow
- Porch décor
- Wreath attachments
- Wooden stakes
- Wall hangings
- Any other scarecrow project you can dream up
Use the faces however you like and make each project completely your own.
We would love to see what you create. Share your finished scarecrow with us or tag ShapeHouse Studio (Facebook or Instagram) so we can celebrate your project.
Download the Scarecrow Project Recipe Card
The printable recipe card includes the materials “ingredients” and four simple steps for painting and assembling your scarecrow.